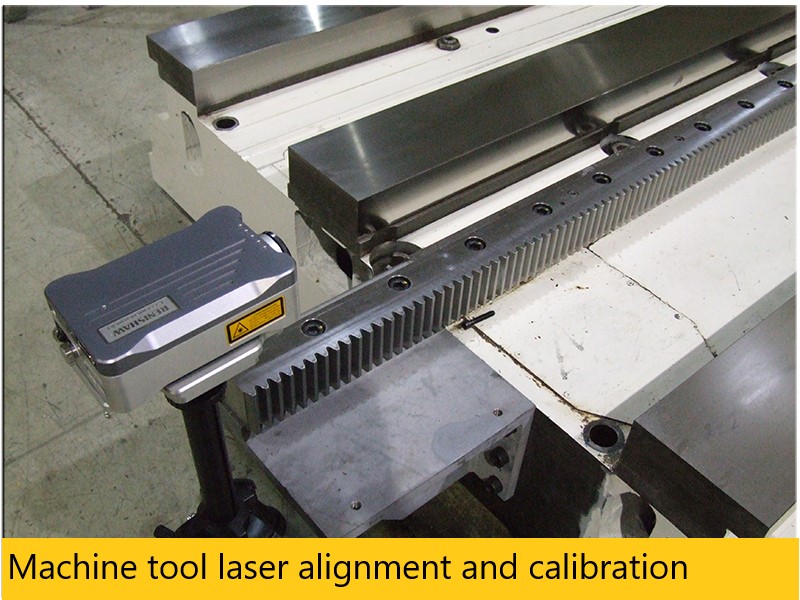
Reduce scrap parts and protect your investment by having a quarterly or annual machine tool laser alignment. Machine tool alignment and calibration is required to maintain your ISO certification!
There is much more to maintenance than keeping the machine running!
Machine tool laser alignment and calibration – One of the most critical factors in any machine tool maintenance program is knowing your machine’s level of accuracy and tolerances. Your machine tool should be level, flat, and square in all axes, mechanically adjusted to acceptable tolerances, and any linear error should be corrected to OEM specifications – which includes documentation certifying the accuracy of the machine.
Significantly Reduce Part Setup Time
One benefit of having a properly aligned machine tool is that part setup time is significantly reduced. An article in the October 1998 issue of Quality in Manufacturing Magazine describes the incredible benefit of laser alignment to the John Deere Corporation. In the words of Jim Abitz, tool and die maker, “…[laser alignment] makes the operators a lot happier because they don’t have to struggle for two or three shifts to get a machine to work properly.”
Our Lasers Align 70% Faster Than Other Methods
Continuously sweeping lasers and live data output create a powerful combination to align machining centers up to 70% faster than traditional or interferometer methods. Downed machines will be up and running, producing quality parts in record time. Hamar’s continuously sweeping lasers are far superior to other point-and-shoot laser systems that require time-consuming manual laser rotation and target setup for each point measured. They also allow the use of multiple targets, which is especially helpful for large machine tools.
Simultaneously Measure 3 Axes with One Setup
Another great time saver is the laser’s ability to measure the three main axes of a machine at the same time. Not only can we measure the flatness and straightness of each axis, but we can also measure the squareness of the three axes. And if there are any additional axes, such as a rotary table or extending quill, we can easily check the parallelism to the main machine axes with the same setup!
How many of the statements below describe your machine? Do you know?
Machine
- Circle interpolation perfect.
- Part programs never edited.
- Zero offsets in control.
- Shims are never required.
- Holds thickness tolerance.
Read More : Mavericksystemscorp.com
Parts
- Hole locations are exact.
- Top and bottom parallel
- All sides square.
- Surface finish smooth
- 180° center locations precise.
If three or more of the items above don’t describe your machine or the parts it produces then you probably have a misalignment or calibration issue. Machine tool alignment and calibration issues don’t go away, they get worse and create more problems and significant downtime. That’s why it’s critical to remove as many elements out of the equation as possible. Depending on the size and numbers of axes of the machine tool, the inspection and correction process for your geometrical errors and calibration of your linear axes may render your machine inoperable for a short time. However, once the initial corrections have been made, minor adjustments should be all that’s required if you have a scheduled inspection and correction performed annually.
Get an Annual Checkup
At Maverick Systems Corporation, we recommend performing a machine tool laser alignment and calibration check on an annual basis after the initial alignment has been performed. Afterwards, any problems that arise can be addressed immediately and corrected quickly.
The Machine Tool Alignment Process
During the course of a typical alignment and calibration session of a machine tool, it is not unusual to encounter some hidden problems. This is where our experience pays off. Having worked on a wide variety of machine tools, we can efficiently identify the problems and correct them as necessary.
Beginning with the machine base, we laser level and align it back to OEM specifications. Next, the ball screw is checked for endplay, and adjusted if needed. The gibs are then checked and adjusted back to specifications. Finally, we continue through all axes of the machine, ensuring the axes are square, parallel, and perpendicular to one another.
The geometry’s of the machine must be aligned before performing any linear calibrations as errors in geometry can effect the linear movement. After completion of alignment, we then proceed on with the linear error compensation of the axes in the control.
Return on Investment
Whether it’s one machine or an entire shop, Maverick Systems Corporation can set up your company with a scheduled laser alignment and calibration program that will fit your maintenance calendar. Your ROI will be immediate and your overall maintenance budget will go down.
It’s time to incorporate laser alignment and calibrations into your maintenance schedule.